As the film industry reopens for business, self-taping is more important than ever with almost every CD choosing online tapes over physical auditions. This makes it a perfect time for you to dust off your tripod and microphone to practise your taping skills at home. In this post I am going to address some the technical elements of putting together a solid self-tape, and cover some of the misconceptions on what to wear and how to present yourself.
The first thing to address is that you don’t need expensive equipment to self-tape, in-fact the tools you already have around you are likely to work best. Two important factors are lighting and sound, if you can use light successfully and record clear audio then your cheap pocket camera or iPhone will be the best device to use.
Setting Up
Location
The first step to a successful self-tape is a suitable location. Find a quiet room that has no or minimal background noise. This will minimise distractions for you but also provide you with clean sound.
Background
Find a plain wall to use as your background, ideally not the same colour as your clothing (which I will touch on later). Do not shoot towards a window, but you can use a window to your advantage; natural daylight is your best friend and will offer the most natural lighting.
If you’re really struggling for a plain background, I know some actors who have used a bedsheet to create a white background or a simple muslin backdrop, which can fold away once you’re done. Here’s the link: Backdrop
Props
Avoid using props as it’s rarely necessary with the script you’re given. This isn’t an opportunity to get creative with sets and dressing, the focus is all on you. Feel free to have a cup on the table if it’s a Café setting or a file should you be in an office, but don’t let it distract from your performance!
Lighting
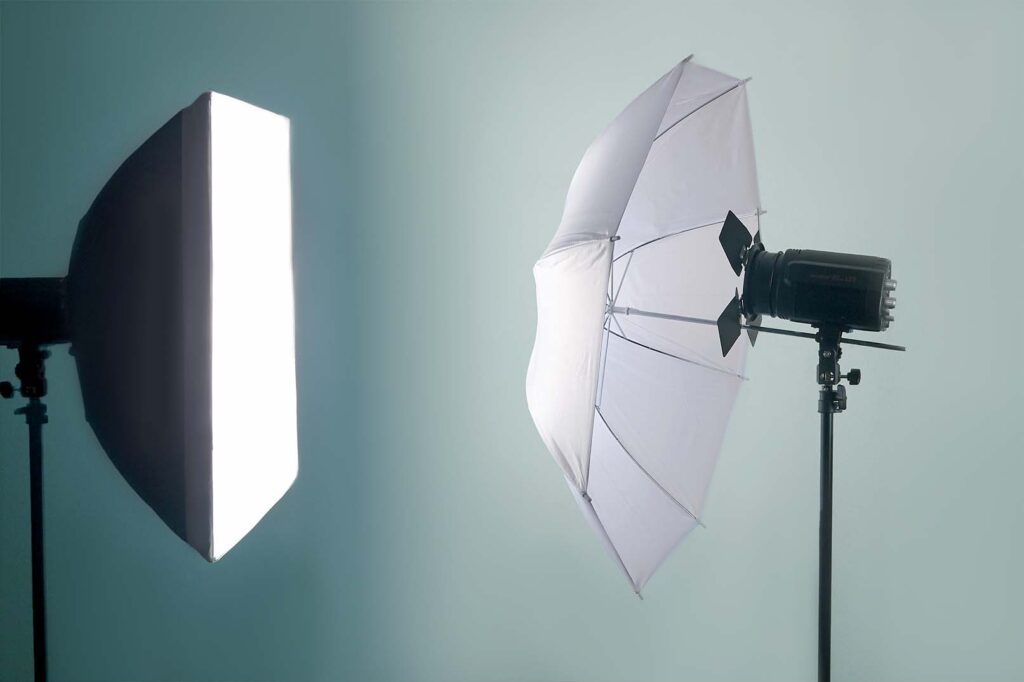
Ultimately you want to avoid harsh shadows. Earlier I mentioned using a window to your advantage – this will work best on a cloudy day when the light is ‘diffused’. Soft natural light from a window will give your face and background an even spread of light. If you live without windows, or in a county where daylight is a luxury then it would be worth investing in a pair of Softbox lights. These will offer the same natural lighting of daylight and are conveniently portable when packed down. Here’s a link to an affordable set I recommend on Amazon: SoftBoxes
If you’re looking to stay really portable, look into an LED panel that you can attach to the shoehorn mount of your DSLR or clamp to your Tripod Stand.
Tripods
Using a tripod will make framing your shot and raising the camera far easier than stacking books. I recommend looking into a Gorilla Pod if you’re using an iPhone, although they can be on the pricey side for what they are. Otherwise, make sure the Tripod you use is tall enough to raise for your ident/slate (which should be stood).
Here’s a link to a simple tripod my students have used, which rises high enough and packs away into a small carry back if you’re on the move: Tripod
Reader
There’s no two ways about it, you MUST have another person to read in for you. Ensure they are confident with using the camera so you don’t give a great performance and find out it didn’t record. Bring the reader as close to the lens as possible, bringing your eye-line towards camera but avoid letting your reader speak too loudly, otherwise their voice will overpower yours. This is where investing in a separate microphone will drastically improve your audio, and is a must if you’re using a DSLR as the built-in audio is unusable! A RODE VideoMicro Pro (Or cheaper off-brand alternatives) is a great solution.
UPDATE: Since lockdown, many actors have been connecting with a friend via Zoom/Skype to read in for them this way you can still correctly pace the scene but maintain your safety and wellbeing but not physically meeting.

Camera Orientation
LANDSCAPE! This isn’t an Insta story so make sure you have your iPhone in landscape when filming.
Hair, Make-Up and Clothing
Clothing
This is always a popular topic with actors. Being creatives we naturally take any opportunity we can to get our paint and brushes out but unfortunately this isn’t an opportunity to showcase your costume collection. Avoid wearing thin stripes when on camera and stick to neutral colours. Stay away from ‘turtle necks’. Do not ‘dress up’ for the the tape, unless they have requested. The reason I advise against this is because you limit yourself to that role; where you might not be suitable for the role you audition for a CD could see you playing an alternative character so avoid limiting your casting.
Hair
Keep your hair back so it’s not to cover your face. If your hair is long, push it back off your shoulders.
Make-Up
Keep it subtle unless something else has been specified. If it’s a hot day feel free to apply light powder to minimise shine on screen. If you have tattoos there’s no need to hide them, if they are undesired they will be hidden with make-up on the shoot.
Filming
Slating (If Required)
Your Ident/Slate should be filmed in a wide-shot showing as much of your body as possible. This is where you can introduce yourself straight down the lens of the camera. If you struggle to get wide enough, cutting off the frame just below the knees will suffice.
A casting director can ask for various pieces of information in the slate so ensure you read what they need to know. This can include:
- Your full name
- Your agent
- Height
- Nationality
- The role you’re auditioning for
The slate is a separate file from the tape itself. You can record the ident separately then using iMovie or Windows Movie Maker stitch the clip in-front of your self tape with a simple hard-cut (no fancy transitions).
 Shot Size
Make sure you are in a close-up shot for the tape. Ultimately the CD wants to see your eyes and face but don’t perform directly to the camera, interact with your reader who will be sat close to the lens. The shot size should not change throughout the tape, this is a fixed static frame and according to the script you will either be sat or stood (but not rigid). Lots of large movement is not preferable and distracting.
Takes
It sounds simple, but ensure you have read in detail what the CD is asking for. They may ask for you to tape more than one scene, so make sure you do! Additionally, it’s worth doing two versions (max) of a take if you want to show the CD something alternative. Find out in advance from your agent or the CD about accent and characterisation. If you know the show or programme you’re taping for, take into account its style and pace letting this inform your performance.
Using the Script
Off-Book is always best and will offer you the best chance of being natural on screen. If you are in a position where the tape has been requested at the last minute, ensure that you’re not looking down too much or obscured by the script. Also DO NOT cut multiple takes together into one. If you make an error, stay in character because the CD will also be looking at how you handle last minute dialogue changes.
File Formats
Your tape should be exported to an MP4, offering universal compatibility on PC & Mac. Try to keep your file size below 100mb. If you’re using an iPhone there’s a handy trick you can do to reduce the video file size: Settings > Camera > Record Video > Choose ‘1080p at 30fps’. If you’re already on this then no need to change, but for those of you with a newer iPhone model it’s likely you’ve been filming 4K video! Not required for a self-tape.
Editing & Sending
Cutting Together
Your ident and tape should be cut into the same timeline. Stay away from using any exciting transition effects, either a dissolve or a hard-cut will be adequate. If the microphone was positioned further away on your ident, it may be worth raising the volume to match that of the tape so there’s consistent audio levels.
Exporting & Naming
Export your timeline to an MP4, this is a universal format suitable for uploading to Vimeo, WeTranfer etc. Give the file a unique but clear name, such as your name and the role you’re auditioning for. It might come as a surprise, but CD’s receive more than one self-tape so label the file clearly so they know who’s on screen.![]()
Sending the File
If you’re using Vimeo or YouTube, you must ensure the video is password protected! It’s likely the script you’ve been given is unreleased and you wouldn’t want to be left with a hefty legal bill. Most CD’s are happy to receive tapes in a downloadable format through the likes of WeTransfer, Yousendit, Dropbox or Hightail. Give the email a subject title similar to the file name.
If you have any burning questions about self-taping feel free to drop me a message on Instagram, I try to reply where I can!
